
Air disc brakes are becoming increasingly popular in commercial vehicles due to their superior performance and ease of maintenance. Proper adjustment of these brakes is crucial for ensuring optimal braking efficiency and safety. This guide will walk you through the process of adjusting air disc brakes, providing you with the knowledge to maintain your vehicle’s braking system effectively.
Air disc brakes operate by using compressed air to push brake pads against a rotor, creating friction to slow or stop the vehicle. Unlike drum brakes, disc brakes offer better heat dissipation, reduced brake fade, and more consistent performance. However, they require periodic adjustment to maintain proper clearance between the brake pads and rotor.
Before we dive into the adjustment process, let’s take a look at the key components of an air disc brake system:
| Component | Function |
|---|---|
| Rotor | Rotating disc attached to the wheel hub |
| Caliper | Houses the brake pads and pistons |
| Brake Pads | Friction material that contacts the rotor |
| Air Chamber | Converts air pressure into mechanical force |
| Adjuster Mechanism | Maintains proper clearance between pads and rotor |
Preparing for Adjustment
Before you begin adjusting your air disc brakes, it’s essential to prepare properly. This preparation ensures your safety and the effectiveness of the adjustment process.
First, park the vehicle on a level surface and engage the parking brake. Chock the wheels to prevent any unexpected movement. Next, release the air pressure from the brake system by opening the drain valves on the air tanks. This step is crucial for safety, as it prevents the brakes from suddenly engaging during the adjustment process.
Locate the brake caliper on the wheel you’ll be adjusting. You’ll need to remove the wheel to access the brake components fully. Use the appropriate tools to safely lift the vehicle and remove the wheel, following all safety precautions outlined in your vehicle’s manual.
Once the wheel is removed, visually inspect the brake components. Look for any signs of excessive wear, damage, or contamination. Pay special attention to the brake pads and rotor surface. If you notice any issues, address them before proceeding with the adjustment.
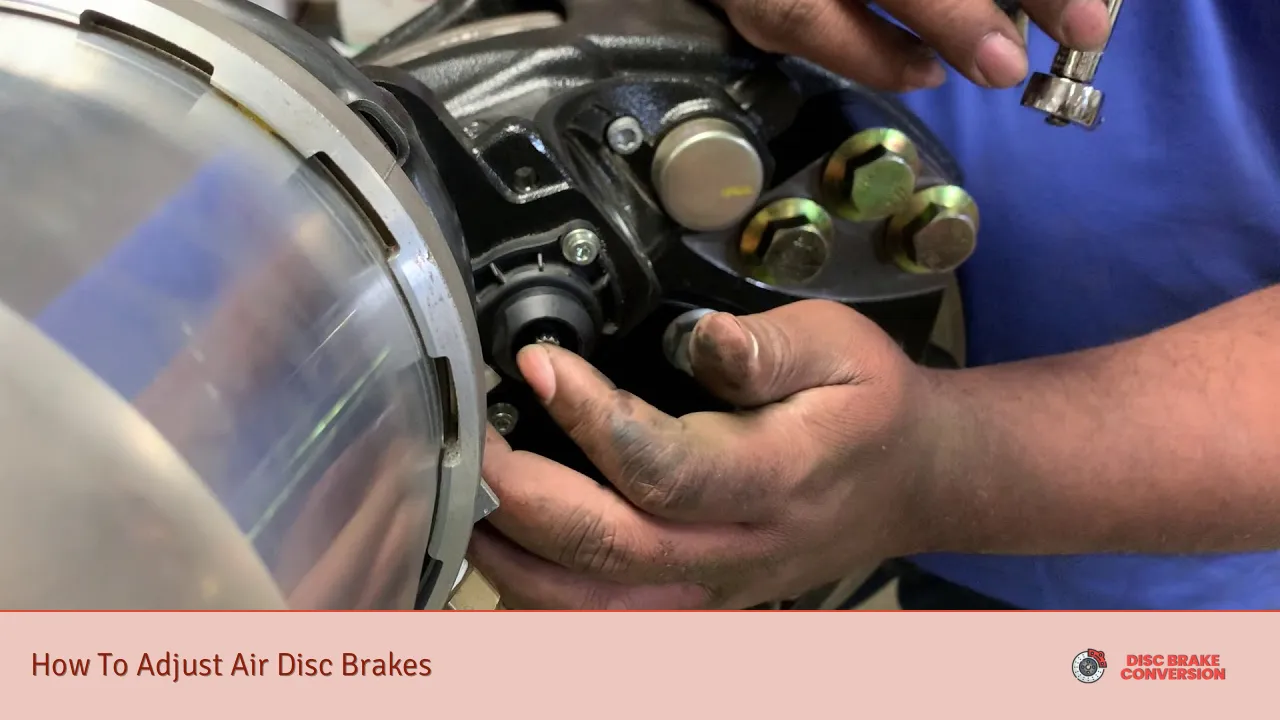
Identifying the Adjuster Mechanism
The adjuster mechanism is a critical component in air disc brakes. It’s typically located on the caliper and is designed to maintain the correct running clearance between the brake pads and the rotor. This mechanism can vary slightly depending on the brake manufacturer, but most use a similar principle.
Look for a hexagonal or star-shaped adjuster on the caliper. This is usually covered by a protective cap to keep out dirt and debris. Remove this cap carefully to access the adjuster. Some models may have the adjuster located on the back of the caliper, so consult your vehicle’s service manual if you’re having trouble locating it.
Adjusting the Brake Clearance
Now that you’ve prepared the brake and located the adjuster, you can begin the actual adjustment process. The goal is to set the correct clearance between the brake pads and the rotor.
1. Rotate the adjuster: Using the appropriate tool (usually a socket wrench with the correct size), turn the adjuster clockwise. This action moves the brake pads closer to the rotor.
2. Check for contact: Continue turning the adjuster until you feel resistance. This indicates that the brake pads are in contact with the rotor.
3. Back off the adjuster: Once you feel contact, rotate the adjuster counterclockwise by a specific amount. The exact number of “clicks” or turns will depend on your brake model, but it’s typically between 2 to 3 clicks or about 1/3 to 1/2 of a turn.
4. Verify clearance: After backing off the adjuster, there should be a small gap between the pads and the rotor. This gap is crucial for proper brake operation and to prevent brake drag.
5. Repeat for both sides: Remember to adjust both the inboard and outboard brake pads if your caliper design allows for it.
Testing the Adjustment
After you’ve made the adjustment, it’s important to test it to ensure proper operation:
- Spin the rotor: With the wheel still off, spin the rotor by hand. It should rotate freely without any rubbing or scraping sounds.
- Check for even wear: Inspect the brake pads for even contact with the rotor. Uneven wear could indicate a problem with the caliper or mounting.
- Verify pad movement: Apply the brake manually by pushing on the air chamber pushrod. The pads should move smoothly and make even contact with the rotor.
Reassembly and Final Checks
Once you’re satisfied with the adjustment, it’s time to reassemble everything:
1. Replace the adjuster cap: Make sure it’s securely in place to protect the adjuster from contamination.
2. Reinstall the wheel: Carefully put the wheel back on, making sure it’s properly seated.
3. Torque the lug nuts: Use a torque wrench to tighten the lug nuts to the manufacturer’s specifications. Always follow the correct tightening sequence.
4. Lower the vehicle: Carefully lower the vehicle back to the ground.
5. Recharge the air system: Close all drain valves and allow the air system to recharge fully.
6. Perform a brake test: Before returning the vehicle to service, perform a thorough brake test in a safe area. Check for proper brake pedal feel, even braking, and no pulling to either side.
Maintenance Tips
To keep your air disc brakes in optimal condition:
- Regularly inspect brake components for wear and damage
- Keep the brake system clean and free from debris
- Check brake pad thickness frequently and replace when necessary
- Lubricate caliper slide pins according to manufacturer recommendations
- Perform adjustments as part of routine maintenance or when brake performance changes
FAQs About How To Adjust Air Disc Brakes
- How often should air disc brakes be adjusted?
Air disc brakes typically require less frequent adjustment than drum brakes, but they should be checked during regular maintenance intervals or if brake performance changes. - Can I adjust air disc brakes without removing the wheel?
While it’s possible on some models, removing the wheel provides better access and allows for a more thorough inspection of brake components. - What tools do I need to adjust air disc brakes?
You’ll need basic hand tools, a socket set, a torque wrench, and possibly a special adjuster tool depending on your brake model. - How do I know if my air disc brakes need adjustment?
Signs include increased stopping distance, uneven braking, or a spongy brake pedal feel. - Is it normal for air disc brakes to make noise after adjustment?
No, properly adjusted air disc brakes should operate quietly. Any unusual noises after adjustment warrant further inspection.