
Adjusting hydraulic disc brakes on a bicycle is essential for optimal performance, safety, and comfort. Properly adjusted brakes ensure that the bike stops effectively and that the brake pads do not rub against the rotor, which can cause wear and tear. This guide provides a comprehensive overview of how to adjust hydraulic disc brakes, including step-by-step instructions and important considerations.
Adjustment Type Description Caliper Alignment Ensures brake calipers are centered over the rotor. Lever Reach Adjustment Modifies the distance of the brake lever from the handlebars.
Understanding Hydraulic Disc Brakes
Hydraulic disc brakes utilize fluid to transfer force from the brake lever to the caliper, providing powerful and consistent braking performance. Unlike mechanical brakes, which rely on cables, hydraulic systems self-adjust as the brake pads wear down. This means that regular maintenance is crucial to ensure that the system functions correctly and that the rider has full control over braking.
The main components of hydraulic disc brakes include:
- Brake lever: The component you squeeze to activate the brakes.
- Brake caliper: Houses the pistons that push the brake pads against the rotor.
- Rotor: The metal disc attached to the wheel that the brake pads clamp onto.
- Brake pads: Friction material that presses against the rotor to slow down or stop the bike.
Understanding these components is vital for effective adjustment.
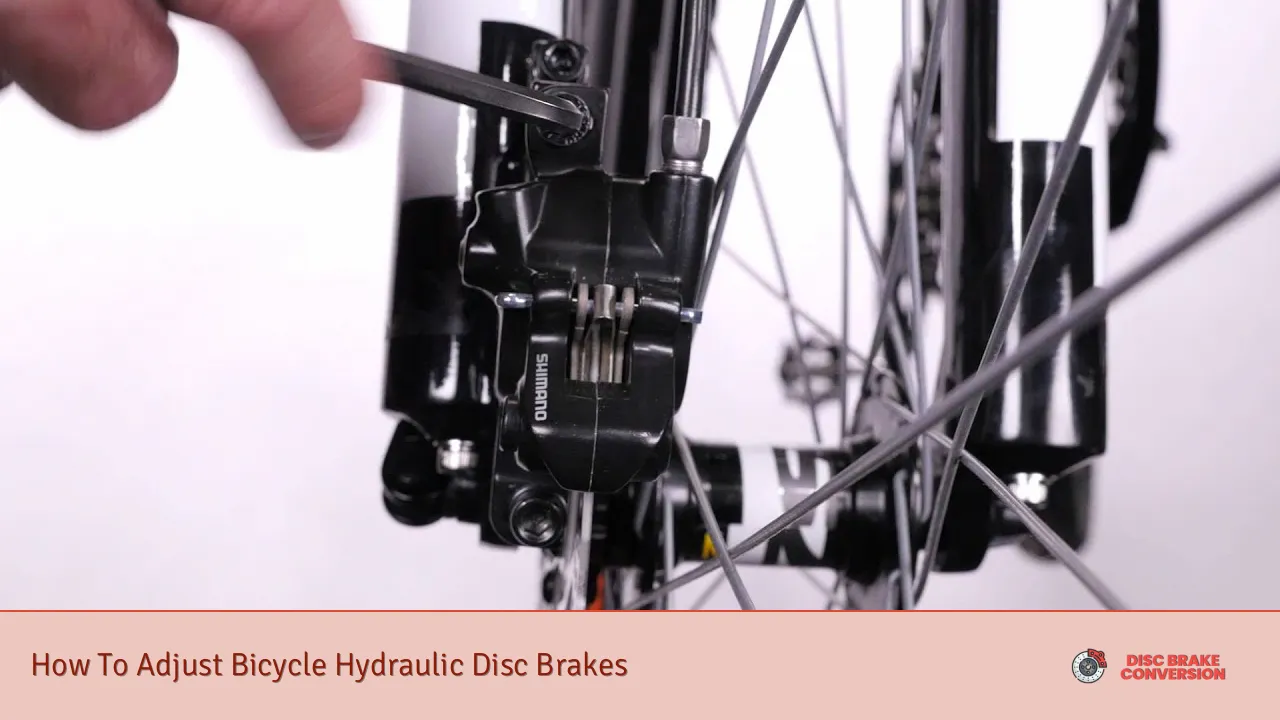
Caliper Alignment Adjustment
Aligning the brake caliper is one of the most critical adjustments for hydraulic disc brakes. Misalignment can cause rubbing against the rotor, leading to decreased performance and increased wear on components.
- Step 1: Begin by loosening the two caliper mounting bolts slightly using an Allen key. This will allow you to move the caliper freely.
- Step 2: Squeeze the brake lever firmly. This action will center the caliper over the rotor as it pushes both brake pads against it.
- Step 3: While holding the brake lever, carefully retighten the caliper bolts. It’s advisable to tighten them in a crisscross pattern to ensure even pressure distribution.
- Step 4: Release the brake lever and spin the wheel. Check if it spins freely without any rubbing from the brake pads. If there is still contact, repeat steps 1 through 3 until properly aligned.
Lever Reach Adjustment
Adjusting the reach of your brake lever can enhance comfort and control while riding. The reach refers to how far away or close your brake lever is from your handlebars when at rest.
- Step 1: Locate the reach adjustment screw on your brake lever. This is typically found near where your fingers grip.
- Step 2: Turn this screw clockwise to bring the lever closer or counterclockwise to move it further away from your handlebars.
- Step 3: Test by squeezing the lever; it should feel comfortable and allow you to engage with minimal effort while maintaining control.
Checking Brake Pad Wear
Regularly checking your brake pads for wear is crucial for maintaining effective braking performance. Worn pads can lead to reduced stopping power and potential damage to your rotors.
- Step 1: Inspect visually by looking through the caliper at your pads. If they appear thin or if you see metal backing, they need replacement.
- Step 2: If you hear a grinding noise while braking, this may indicate that your pads are worn out and should be replaced immediately.
Bleeding Hydraulic Brakes
If you notice that your brakes feel spongy or if there’s an inconsistent feel when pulling on the lever, it may be necessary to bleed your hydraulic system. This process removes air bubbles trapped in the fluid line, which can affect braking performance.
- Step 1: Gather necessary tools, including a bleed kit specific to your brake model, a syringe, and mineral oil or DOT fluid as required by your system.
- Step 2: Remove any wheel or components obstructing access to your caliper and lever.
- Step 3: Follow manufacturer instructions for bleeding procedures, which typically involve injecting fluid into one end while allowing old fluid and air bubbles to escape from another end.
- Step 4: After bleeding, check lever feel again; it should be firm without excessive travel before engaging brakes.
Final Checks
After making adjustments, always perform a final check of all components:
- Ensure all bolts are tightened according to manufacturer specifications.
- Spin each wheel again to confirm no rubbing occurs.
- Test ride in a safe area to ensure effective braking response before heading out on more challenging terrain.
FAQs About Adjusting Bicycle Hydraulic Disc Brakes
- How often should I adjust my hydraulic disc brakes?
Adjustments should be made whenever you notice changes in performance or after significant wear on components. - Can I adjust my hydraulic brakes without special tools?
Basic adjustments like caliper alignment can be done with an Allen key; however, bleeding may require specific tools. - What do I do if my brakes still rub after adjustment?
If rubbing persists, check for bent rotors or damaged components that may need replacement. - Is it normal for hydraulic brakes to feel spongy?
A spongy feel usually indicates air in the system; bleeding is necessary in this case. - Can I replace my own brake pads?
Yes, replacing brake pads is a straightforward process that most cyclists can perform with basic tools.
Adjusting bicycle hydraulic disc brakes may seem daunting at first, but with practice and understanding of each component’s function, it becomes an essential skill for any cyclist. Regular maintenance ensures safety and enhances riding enjoyment by providing reliable stopping power when needed most.