
Disc brake calipers are crucial components of a bicycle’s braking system, responsible for applying pressure to the brake rotors and bringing the bike to a stop. Proper adjustment of these calipers is essential for optimal braking performance, safety, and longevity of your brake system. Whether you’re a seasoned cyclist or a beginner, knowing how to adjust disc brake calipers can save you time and money on maintenance while ensuring your bike performs at its best.
Adjusting disc brake calipers involves aligning the caliper body with the rotor to ensure even pad contact and prevent rubbing. This process is relatively straightforward but requires attention to detail and patience. By following the steps outlined in this guide, you’ll be able to fine-tune your disc brakes for smooth, efficient operation.
| Tools Needed | Difficulty Level |
|---|---|
| Allen keys (3-5mm), Torque wrench, Flashlight | Intermediate |
Preparing for Disc Brake Caliper Adjustment
Before diving into the adjustment process, it’s crucial to prepare your workspace and gather the necessary tools. Start by placing your bike in a bike stand or flipping it upside down to access the wheels easily. Ensure you have good lighting, as you’ll need to inspect small gaps between the brake pads and rotor.
The primary tools you’ll need are:
- Allen keys (typically 3mm, 4mm, and 5mm)
- Torque wrench
- Flashlight or headlamp
- Clean rag
It’s also helpful to have a white or light-colored background behind the caliper you’re adjusting. This contrast makes it easier to see the alignment between the rotor and brake pads.
Begin by visually inspecting your brake system. Look for any obvious signs of wear, damage, or contamination on the brake pads and rotor. If you notice any issues, address these before proceeding with caliper adjustment. Clean the rotor with isopropyl alcohol and a lint-free cloth to remove any dirt or oil that could affect braking performance.
Next, check that your wheel is properly seated in the dropouts and the quick release or thru-axle is securely tightened. A misaligned wheel can make it impossible to achieve proper caliper alignment.
Step-by-Step Disc Brake Caliper Adjustment
Now that you’re prepared, let’s walk through the adjustment process step by step:
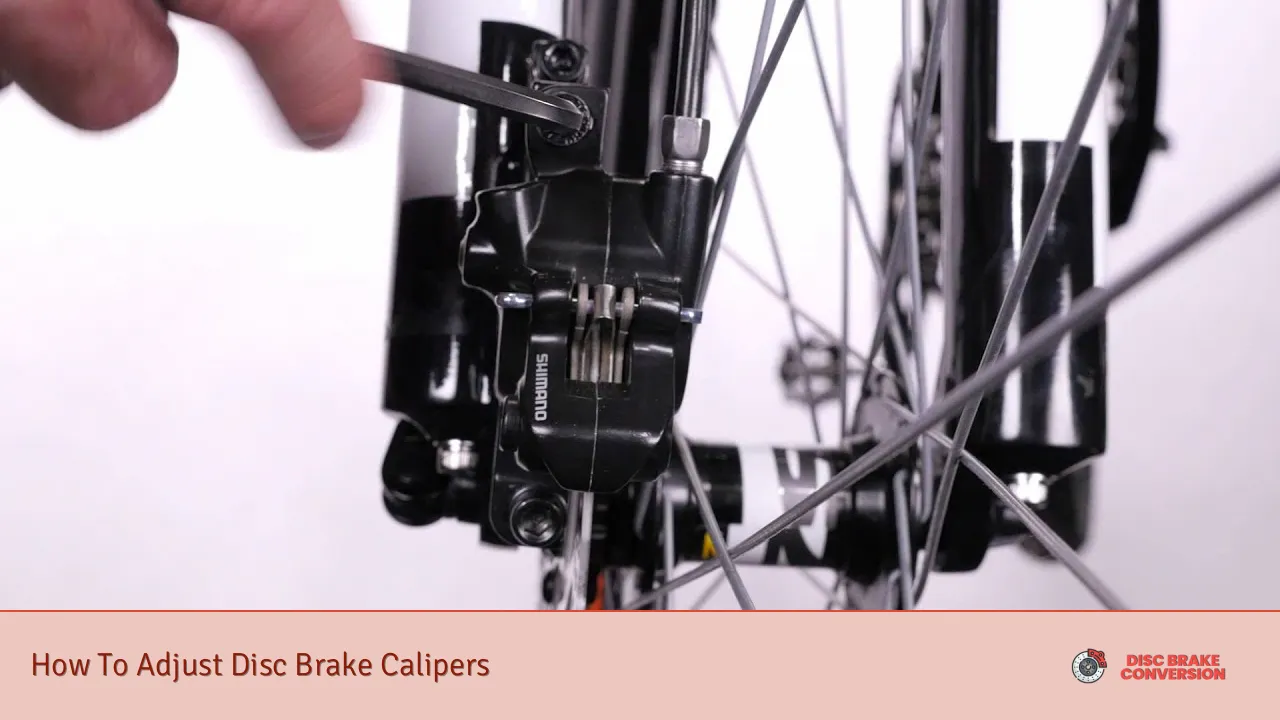
1. Loosen Caliper Mounting Bolts
Locate the two bolts that secure the caliper to the frame or fork. Using the appropriate Allen key, loosen these bolts just enough so that the caliper can move freely from side to side. Don’t remove the bolts entirely; you want the caliper to remain in place but be able to shift position.
2. Center the Caliper
With the mounting bolts loose, you can now center the caliper over the rotor. There are two main methods to achieve this:
Method A: Visual Alignment
- Look through the caliper from above and behind.
- Manually adjust the caliper position so that the rotor appears centered between the brake pads.
- Ensure there’s an equal gap on both sides of the rotor.
Method B: Lever Squeeze Technique
- Squeeze the brake lever firmly and hold it.
- While maintaining pressure on the lever, tighten the caliper mounting bolts.
- This method allows the caliper to self-center as the pads contact the rotor.
3. Tighten Mounting Bolts
Once you’ve centered the caliper, it’s time to secure it in place:
- Using your torque wrench, tighten the mounting bolts to the manufacturer’s specified torque.
- Typically, this is between 6-8 Nm, but always check your bike’s manual for the correct specification.
- Tighten the bolts alternately and incrementally to ensure even pressure and prevent the caliper from shifting.
4. Check for Rotor Rubbing
After tightening the bolts, spin the wheel to check for any rubbing between the rotor and brake pads:
- Listen for any scraping sounds as the wheel rotates.
- Look closely at the gap between the pads and rotor as the wheel spins.
- If you notice rubbing, loosen the bolts slightly and make minor adjustments to the caliper position.
5. Fine-Tune Pad Clearance
For mechanical disc brakes, you may need to adjust the pad clearance:
- Locate the pad adjustment dial or screw on the caliper.
- Turn it clockwise to move the pads closer to the rotor, or counterclockwise to increase clearance.
- Aim for a gap of about 0.3mm between each pad and the rotor.
6. Test Brake Performance
Once you’ve completed the adjustment:
- Squeeze the brake lever firmly several times to ensure proper pad engagement.
- Take the bike for a short test ride in a safe area.
- Check that the brakes engage smoothly and effectively without any pulsing or inconsistency.
Troubleshooting Common Disc Brake Issues
Even after careful adjustment, you might encounter some issues. Here are some common problems and their solutions:
Persistent Rotor Rubbing
- Check if the rotor is true (straight). A bent rotor can cause rubbing even with perfect caliper alignment.
- Use a rotor truing tool to gently straighten any warped sections.
Uneven Pad Wear
- This could indicate a misaligned caliper or a sticky piston.
- Clean and lubricate the caliper pistons, ensuring they move freely.
Spongy Brake Feel
- For hydraulic systems, this often indicates air in the lines.
- Bleed the brakes according to the manufacturer’s instructions.
Squealing Brakes
- Clean the rotor and pads with isopropyl alcohol.
- Check for glazed pads, which may need replacement.
- Ensure the caliper mounting bolts are tightened to the correct torque.
Remember, if you’re unsure about any part of the adjustment process or encounter persistent issues, it’s best to consult a professional bike mechanic. Proper brake function is critical for your safety on the road or trail.
Maintaining Your Disc Brake System
Regular maintenance can prevent many issues and extend the life of your brake system:
- Inspect your brakes regularly for pad wear, rotor condition, and proper alignment.
- Clean your rotors periodically with isopropyl alcohol to remove contaminants.
- Replace brake pads when they wear down to about 1.5mm thickness.
- Bleed hydraulic brakes annually or as recommended by the manufacturer.
- Avoid contaminating the system with oil or grease during maintenance.
By following these maintenance practices and knowing how to adjust your disc brake calipers, you’ll ensure consistent, reliable braking performance on every ride. Remember, well-maintained brakes not only improve your cycling experience but are also crucial for your safety.
FAQs About How To Adjust Disc Brake Calipers
- How often should I adjust my disc brake calipers?
Adjust them whenever you notice reduced braking performance or hear rubbing sounds from the rotor. - Can I adjust disc brake calipers without removing the wheel?
Yes, in most cases you can adjust the calipers with the wheel in place, which is often easier for alignment. - What causes disc brake calipers to become misaligned?
Impacts, vibrations during riding, or improper installation of wheels can cause misalignment over time. - Is it normal for disc brakes to have a slight rub?
A very slight, occasional rub may be normal, but consistent rubbing indicates the need for adjustment. - How do I know if my disc brake pads need replacement?
Replace pads when they’re worn to about 1.5mm thickness or if you notice reduced braking power or unusual noises.