
Disc brakes are a critical component of modern vehicles, providing reliable stopping power in various conditions. However, like any mechanical system, they can experience issues that require attention. Understanding how to fix disc brakes can save you time and money while ensuring your vehicle remains safe and efficient. This guide will cover common problems with disc brakes, how to diagnose these issues, and provide step-by-step instructions for repairs.
Common Issues Symptoms Worn Brake Pads Squeaking or grinding noises Pulsating Brake Pedal Brake rotor warping Spongy Brake Lever Air in hydraulic lines Brake Dragging Caliper misalignment or stuck piston
Diagnosing Disc Brake Problems
Before attempting any repairs, it’s essential to diagnose the problem accurately. This involves visually inspecting the brake components and performing some basic tests.
- Check Brake Pads: Inspect the thickness of the brake pads. If they are less than 3mm thick or show signs of glazing (a shiny surface), they need replacement.
- Inspect Brake Rotors: Look for cracks, warping, or excessive wear on the rotors. A warped rotor can cause a pulsating sensation in the brake pedal when applied.
- Test Brake Lever Response: For hydraulic systems, squeeze the brake lever to check for sponginess. If it feels soft, air may be trapped in the hydraulic lines.
- Listen for Noises: Pay attention to any unusual sounds when braking, such as squealing or grinding, which may indicate worn pads or contamination.
Fixing Worn Brake Pads
Replacing worn brake pads is one of the most common maintenance tasks for disc brakes. Here’s how to do it:
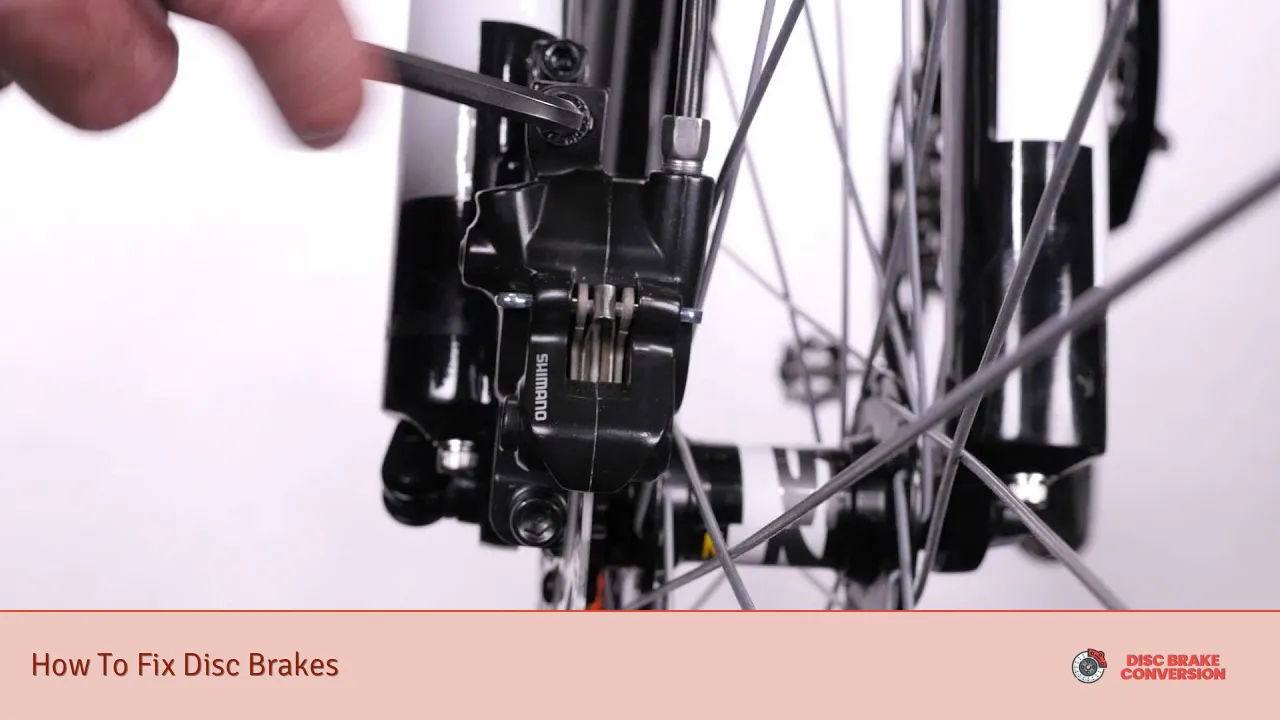
1. Gather Tools: You will need a T25 Torx wrench, a 5mm Allen wrench, a flathead screwdriver, and a brake pad spreader.
2. Remove the Wheel: Loosen and remove the wheel to access the brake caliper.
3. Remove Old Pads: Use the appropriate tools to remove the caliper and take out the old pads. Be cautious of any retaining pins that may hold the pads in place.
4. Clean Caliper Area: Wipe down the inside of the caliper with a clean rag and degreaser to remove any dirt or debris.
5. Install New Pads: Insert new pads into the caliper without touching their surface with your fingers to avoid contamination.
6. Reassemble Caliper: Reattach the caliper over the new pads and ensure it is securely fastened.
7. Reattach Wheel: Put the wheel back on and tighten all bolts to manufacturer specifications.
8. Test Brakes: Before driving, pump the brake lever several times to seat the new pads against the rotor properly.
Adjusting Calipers
Misaligned calipers can lead to uneven wear on brake pads or dragging brakes. Here’s how to adjust them:
1. Loosen Caliper Bolts: Use an Allen key to slightly loosen the bolts holding the caliper in place.
2. Center Caliper: Pull the brake lever to push the pads against the rotor, centering the caliper over it.
3. Tighten Bolts: While holding the brake lever, tighten the caliper bolts securely.
4. Check Alignment: Release the lever and spin the wheel to ensure there is no rubbing from the pads against the rotor.
Bleeding Hydraulic Brakes
If your brake lever feels spongy, you may need to bleed your hydraulic brakes:
1. Gather Supplies: You’ll need a syringe or bleed kit, appropriate brake fluid (DOT or mineral oil), and a container for old fluid.
2. Locate Bleed Valve: Find the bleed valve on your brake caliper.
3. Attach Syringe: Fill your syringe with fresh brake fluid and attach it to the bleed valve.
4. Open Bleed Valve: Carefully open the bleed valve while pulling on the syringe plunger to draw fluid through until no air bubbles appear.
5. Close Valve: Once clear fluid flows out without bubbles, close the bleed valve securely.
6. Repeat if Necessary: You may need to repeat this process until all air is removed from the system.
7. Check Fluid Levels: Ensure that your brake fluid reservoir is topped off after bleeding.
Fixing Brake Dragging Issues
Dragging brakes can occur due to misalignment or stuck pistons:
1. Inspect Calipers and Pistons: Check for any visible signs of damage or corrosion on calipers and pistons.
2. Clean Components: Use a cleaning solution designed for brakes to clean any dirt or debris from around pistons and calipers.
3. Lubricate Moving Parts: Apply a small amount of appropriate lubricant on sliding surfaces of calipers but avoid getting any on brake pads or rotors.
4. Check for Sticking Pistons: If pistons are stuck, gently push them back into their housing using a flathead screwdriver while applying pressure on them with your hand.
5. Reassemble and Test: After cleaning and lubricating, reassemble everything and test drive at low speeds to ensure proper function without dragging noises.
Maintaining Disc Brakes
Regular maintenance can prevent many common disc brake issues:
- Inspect brake pads every few months for wear.
- Clean rotors periodically with a dedicated cleaner.
- Check hydraulic fluid levels regularly.
- Ensure all components are free from rust and dirt.
- Replace worn components promptly before they lead to more significant issues.
FAQs About How To Fix Disc Brakes
- How often should I replace my disc brake pads?
Brake pads should be replaced when they wear down to less than 3mm thick. - What causes spongy brakes?
A spongy feeling usually indicates air trapped in hydraulic lines. - Can I clean my disc rotors?
Yes, use a dedicated disc brake cleaner and avoid touching them with bare hands. - What tools do I need for replacing disc brakes?
You will typically need wrenches, screwdrivers, and possibly a pad spreader. - How do I know if my rotors are warped?
Pulsating sensations in your brake pedal when braking often indicate warped rotors.
By following these steps, you can effectively address many common issues associated with disc brakes, ensuring reliable performance and safety on your vehicle. Regular maintenance will help prolong their lifespan and enhance overall braking efficiency.