
Disc brakes are essential components of modern bicycles, providing reliable stopping power and performance. However, over time, these brakes can become misaligned or loose, leading to decreased effectiveness and safety concerns. Properly tightening and adjusting your disc brakes is crucial for optimal performance. This guide will walk you through the steps necessary to tighten disc brakes effectively, ensuring your bike operates safely and efficiently.
Step Description 1 Gather necessary tools 2 Identify the type of disc brakes 3 Adjust cable tension 4 Center the brake caliper 5 Test the brakes
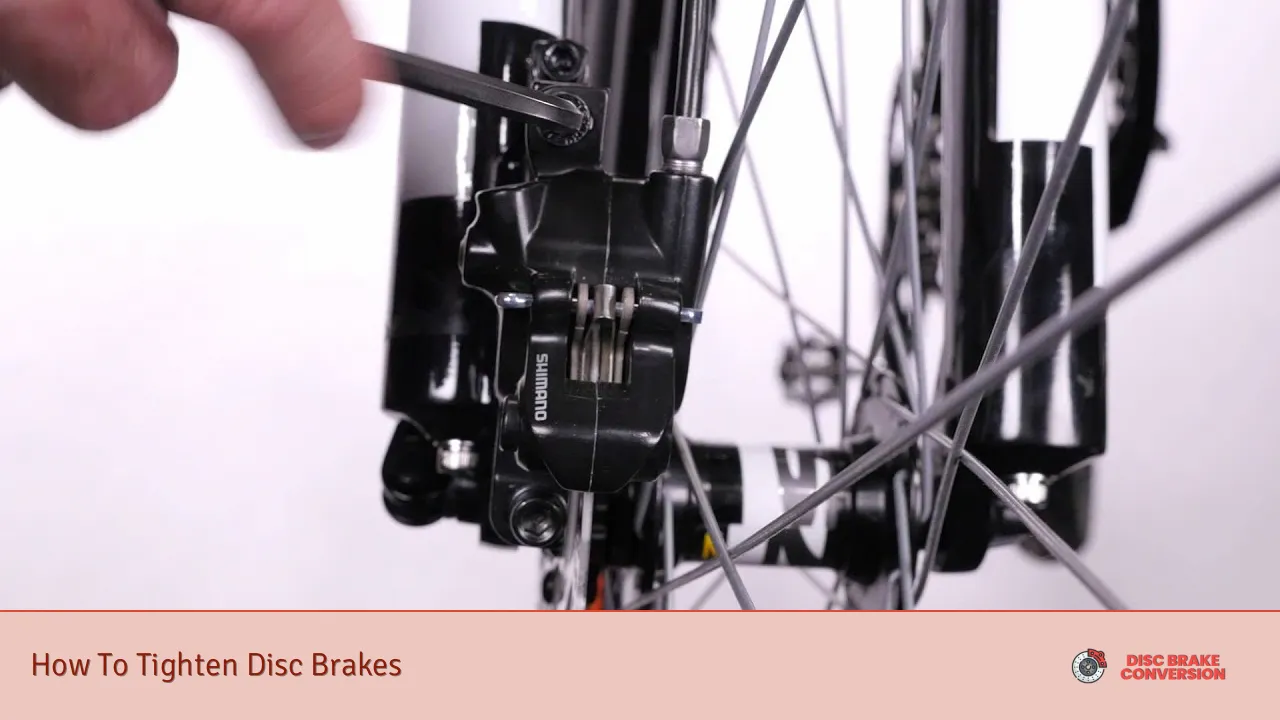
Understanding Disc Brakes
Disc brakes work by using friction to slow down or stop the rotation of a wheel. They consist of several key components: the brake rotor, caliper, brake pads, and hydraulic or mechanical actuation systems. When you pull the brake lever, the caliper squeezes the brake pads against the rotor, creating friction that slows down the bike.
Important info: Regular maintenance and adjustments are necessary to keep disc brakes functioning correctly. Misalignment can lead to brake rub, reduced stopping power, and increased wear on components.
Types of Disc Brakes
There are two main types of disc brakes: mechanical and hydraulic. Mechanical disc brakes use a cable system to actuate the caliper, while hydraulic disc brakes use fluid pressure. Understanding which type you have is essential for proper adjustment.
- Mechanical Disc Brakes: These are generally easier to adjust. They feature a cable that can be tightened or loosened using a barrel adjuster.
- Hydraulic Disc Brakes: These require more precise adjustments and may involve bleeding the system if air gets trapped.
Tools Needed for Adjustment
Before starting any adjustments, gather the following tools:
- Allen wrenches (typically 4mm or 5mm)
- A torque wrench (for precise tightening)
- A barrel adjuster tool (if applicable)
- A clean cloth (for wiping components)
Having these tools ready will make the process smoother and more efficient.
Adjusting Cable Tension
For mechanical disc brakes, adjusting cable tension is often the first step in tightening your brakes.
- Locate the barrel adjuster on your brake lever or caliper.
- Turn it counter-clockwise to increase tension on the cable. This should reduce lever travel and improve responsiveness.
- If turning the barrel adjuster does not resolve the issue, you may need to re-clamp the cable at the caliper.
Steps for Re-Clamping Cable
- Loosen the cable clamp bolt on the caliper.
- Squeeze the brake lever to engage the pads against the rotor.
- Pull additional cable through until it is taut but not overly tight.
- Tighten the clamp bolt while holding the lever down.
This method ensures that your brake pads are correctly aligned with the rotor.
Centering the Brake Caliper
After adjusting cable tension, centering the brake caliper is crucial for optimal performance. Misalignment can cause one pad to rub against the rotor while allowing insufficient contact from the other pad.
Steps to Center Caliper
1. Loosen both caliper mounting bolts slightly using an Allen wrench.
2. Squeeze the brake lever firmly to engage both pads against the rotor.
3. While holding the lever, carefully tighten each mounting bolt alternately. This helps prevent movement during tightening.
4. Release the brake lever and spin the wheel to check for any rubbing sounds. If there is still contact, repeat this process until properly centered.
Important info: Ensure that both pads are equally spaced from the rotor when engaged; this prevents uneven wear and enhances braking efficiency.
Testing Your Adjustments
Once you’ve made adjustments to both cable tension and caliper alignment, it’s time to test your brakes:
- Spin your wheel and listen for any rubbing sounds from either pad against the rotor.
- Pull your brake lever firmly but smoothly; you should feel immediate resistance without excessive travel.
- If everything feels good, take your bike for a short test ride in a safe area to ensure braking performance is restored.
If you notice any issues during testing, revisit previous steps until everything feels right.
Maintaining Your Disc Brakes
Regular maintenance is vital for keeping your disc brakes in top condition:
- Inspect Brake Pads: Check for wear regularly; replace them if they appear thin or unevenly worn.
- Clean Components: Keep rotors and pads free from dirt and oil. Use rubbing alcohol or a dedicated bike cleaner.
- Check Rotor Alignment: Ensure that rotors are true (not warped) by spinning them and observing any wobble.
- Monitor Cable Tension: Periodically check that cable tension remains adequate as cables can stretch over time.
By performing these maintenance tasks regularly, you’ll prolong your brake system’s life and maintain optimal performance.
FAQs About How To Tighten Disc Brakes
- How often should I adjust my disc brakes?
You should check and adjust your disc brakes every few months or whenever you notice changes in braking performance. - What tools do I need to tighten my disc brakes?
You will need Allen wrenches, a torque wrench, and possibly a barrel adjuster tool. - Can I adjust hydraulic disc brakes myself?
While basic adjustments can be made, hydraulic systems may require professional assistance for bleeding or complex issues. - What causes my brake pads to rub against the rotor?
This can occur due to misalignment of the caliper or worn-out brake pads. - Is it safe to ride with misaligned disc brakes?
No, riding with misaligned brakes can reduce stopping power and increase wear on components.
Tightening disc brakes is a straightforward process that enhances safety and performance. By following these steps diligently—adjusting cable tension, centering calipers, and maintaining components—you ensure a smooth riding experience with reliable stopping power. Regular checks will keep your bike in top shape for all your cycling adventures!