
Hydraulic disc brakes are a popular choice for cyclists due to their superior stopping power and performance in various weather conditions. However, over time, these brakes may require adjustment to maintain optimal functionality. Tightening hydraulic disc brakes involves a series of steps to ensure proper alignment and performance. This process is crucial for maintaining safety and efficiency while riding.
Hydraulic disc brakes work by using fluid pressure to push brake pads against a rotor, creating friction to slow or stop the bike. Unlike mechanical disc brakes, which use a cable system, hydraulic brakes rely on a closed system of brake fluid to transfer force from the lever to the caliper. This design offers more consistent performance and requires less frequent adjustment than mechanical systems.
| Component | Function |
|---|---|
| Brake lever | Initiates braking action |
| Master cylinder | Pressurizes brake fluid |
| Brake lines | Transfers fluid pressure |
| Caliper | Houses pistons and brake pads |
| Rotor | Provides friction surface for braking |
Assessing Brake Performance
Before tightening your hydraulic disc brakes, it’s essential to assess their current performance. Signs that your brakes may need adjustment include a soft or spongy feel at the lever, reduced stopping power, or a lever that pulls too close to the handlebar. These issues can often be resolved through proper tightening and adjustment techniques.
Start by visually inspecting your brake system. Look for any signs of fluid leaks, worn brake pads, or damaged rotors. If you notice any of these issues, address them before proceeding with the tightening process. Worn components can significantly impact brake performance and may require replacement rather than simple adjustment.
Next, check the alignment of the brake caliper relative to the rotor. The rotor should pass through the center of the caliper without rubbing against either side. If you notice any misalignment, this will need to be corrected as part of the tightening process.
Spin the wheel and listen for any rubbing or scraping sounds. These noises can indicate that the brake pads are too close to the rotor or that the caliper is misaligned. Make a note of any issues you observe, as these will guide your adjustment process.
Adjusting Brake Lever Reach
The first step in tightening hydraulic disc brakes often involves adjusting the brake lever reach. This adjustment ensures that the lever is positioned comfortably for your hand size and riding style. Most modern hydraulic brake systems feature a reach adjustment screw located on the lever body.
To adjust the reach:
- Locate the reach adjustment screw on your brake lever
- Use an Allen key to turn the screw clockwise to move the lever closer to the handlebar
- Turn the screw counterclockwise to move the lever further from the handlebar
- Make small adjustments and test the feel after each turn
- Aim for a lever position that allows comfortable braking with one or two fingers
Remember that the ideal lever position may vary depending on your hand size and personal preference. The goal is to find a setting that allows you to apply maximum braking force without straining your hand or compromising control of the bike.
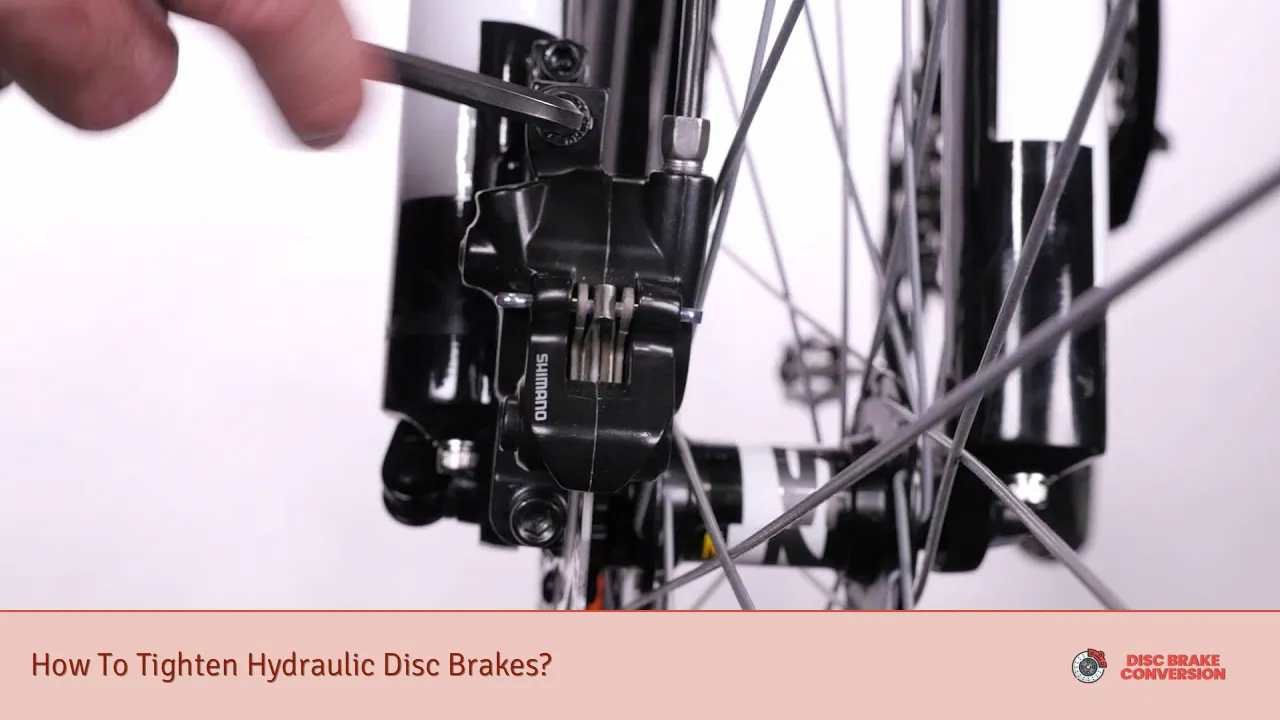
Aligning the Brake Caliper
Proper caliper alignment is crucial for optimal brake performance. A misaligned caliper can cause uneven pad wear, reduced braking power, and annoying rubbing noises. To align the caliper:
- Loosen the caliper mounting bolts slightly, allowing the caliper to move freely
- Squeeze the brake lever firmly to center the caliper over the rotor
- While holding the lever, tighten the mounting bolts alternately in small increments
- Release the lever and spin the wheel to check for any rubbing
- If rubbing persists, repeat the process, making minor adjustments to the caliper position
For more precise alignment, you can use the paper method:
- Cut two thin strips of paper or business card
- Place one strip on each side of the rotor, between the rotor and brake pads
- Squeeze the brake lever to center the caliper
- Tighten the mounting bolts while maintaining pressure on the lever
- Carefully remove the paper strips and check for even clearance on both sides
This method helps ensure that the brake pads are perfectly centered on the rotor, minimizing the risk of rubbing and optimizing brake performance.
Adjusting Pad Clearance
After aligning the caliper, you may need to adjust the pad clearance to ensure optimal brake response. The goal is to have the pads as close to the rotor as possible without causing rubbing. This minimizes lever travel and improves braking efficiency.
For most hydraulic systems, pad clearance is self-adjusting. However, if you notice excessive lever travel or poor brake response, you can try the following:
- Pump the brake lever several times to reset the pad position
- If the problem persists, you may need to bleed the brake system to remove any air bubbles
- Some brake models have a pad contact adjustment screw that allows fine-tuning of the pad position
It’s important to note that pad wear will naturally increase the clearance over time. If you’ve been using your brakes for a while without adjustment, you may need to replace the pads to restore proper clearance and performance.
Bleeding the Brake System
If you’ve completed the above steps and still experience a soft or spongy brake feel, your hydraulic system may need bleeding. Bleeding removes air bubbles from the brake lines, ensuring consistent fluid pressure and firm lever feel.
Bleeding hydraulic brakes requires specific tools and brake fluid. If you’re not comfortable performing this task, it’s best to consult a professional bike mechanic. However, if you decide to bleed your brakes yourself, follow these general steps:
- Gather the necessary tools: bleed kit, appropriate brake fluid, and clean rags
- Remove the wheel to avoid contaminating the rotor or pads
- Attach the bleed kit to the caliper bleed port
- Open the reservoir on the brake lever
- Inject new fluid while allowing old fluid and air bubbles to escape
- Close the system and test the brake feel
Remember that different brake manufacturers may have specific bleeding procedures. Always consult your brake’s user manual or the manufacturer’s website for detailed instructions tailored to your specific brake model.
Maintaining Brake Performance
Regular maintenance is key to keeping your hydraulic disc brakes in top condition. Incorporate these practices into your routine:
- Clean your rotors regularly with isopropyl alcohol to remove contaminants
- Inspect brake pads for wear and replace them when necessary
- Check for fluid leaks around the caliper, hoses, and lever
- Keep an eye on rotor condition, looking for warping or excessive wear
- Periodically bleed the system to maintain optimal performance
By following these maintenance practices and knowing how to tighten and adjust your hydraulic disc brakes, you can ensure consistent, powerful braking performance on every ride. Remember that if you’re ever unsure about performing these adjustments yourself, it’s always best to consult a professional bike mechanic to ensure your brakes are in perfect working order.
FAQs About How To Tighten Hydraulic Disc Brakes
- How often should I adjust my hydraulic disc brakes?
Adjust them when you notice reduced performance or after significant pad wear, typically every 3-6 months for regular riders. - Can I use any type of fluid to bleed my brakes?
No, always use the specific brake fluid recommended by your brake manufacturer to avoid system damage. - Why do my brakes feel spongy after adjustment?
Spongy brakes often indicate air in the system. Try bleeding the brakes to remove air bubbles. - Is it normal for disc brakes to make noise?
Some noise is normal, especially when wet, but persistent squealing or grinding indicates a need for adjustment or pad replacement. - Can I adjust hydraulic brakes without special tools?
Basic adjustments can be made with Allen keys, but bleeding the system requires a specific bleed kit for best results.