
Disc brakes are a critical component of modern vehicles, providing the necessary stopping power to ensure safety and performance. Over time, however, these brake systems can experience wear and tear due to various factors, necessitating repairs or replacements. Understanding the reasons for disc brake repair, the signs that indicate a need for maintenance, and the steps involved in the repair process is essential for vehicle owners.
The primary reasons for disc brake repair include wear from regular use, exposure to environmental elements, and mechanical failures. As brake pads press against the rotors to create friction and stop the vehicle, both components gradually degrade. Additionally, factors such as driving habits, vehicle load, and road conditions can accelerate this wear. Recognizing early signs of brake issues can prevent more extensive damage and costly repairs in the future.
This article will delve into the specifics of why disc brakes require repairs, how to identify problems early on, and outline the repair process step by step.
| Reason for Repair | Description |
|---|---|
| Wear and Tear | Brake pads and rotors degrade over time due to friction. |
| Environmental Factors | Exposure to moisture, dirt, and debris can lead to corrosion. |
| Mechanical Failures | Issues such as caliper failure or brake fluid leaks can impair function. |
Understanding Disc Brake Components
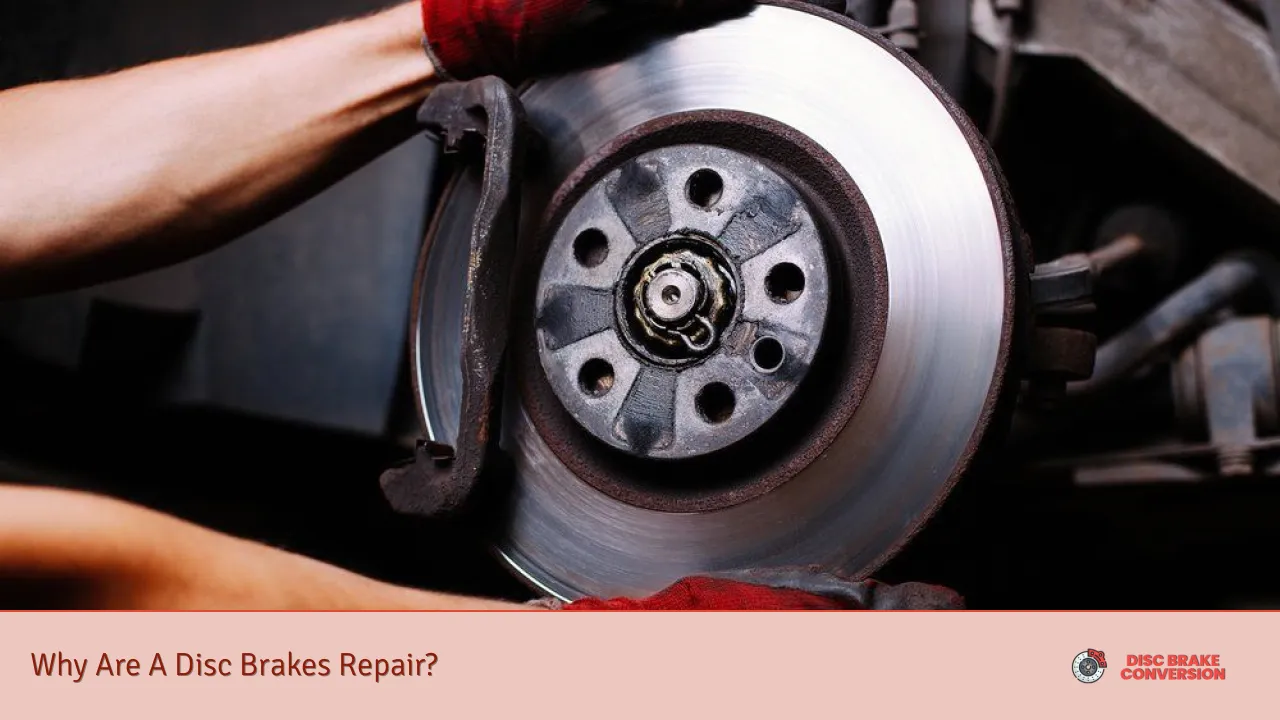
Disc brakes consist of several key components that work together to ensure effective braking. Understanding these components is crucial when discussing repairs.
- Brake Rotors: These are metal discs attached to the wheel hub. When you press the brake pedal, brake pads clamp onto the rotors to slow down or stop the vehicle.
- Brake Pads: These are friction materials that press against the rotors. They come in various materials such as organic, semi-metallic, or ceramic.
- Calipers: The caliper houses the brake pads and contains pistons that push the pads against the rotors when braking.
- Brake Lines: These carry brake fluid from the master cylinder to the calipers.
- Brake Fluid: This hydraulic fluid transmits force from the brake pedal to the calipers.
Each component plays a vital role in ensuring that your braking system functions correctly. If any part fails or wears out, it can lead to decreased braking efficiency or complete failure.
Signs That Your Disc Brakes Need Repair
Recognizing when your disc brakes require repair is crucial for maintaining vehicle safety. Here are some common signs:
- Squeaking or Squealing Noises: This often indicates worn-out brake pads. Many pads have built-in wear indicators that produce noise when they need replacement.
- Vibration or Pulsation: If you feel vibrations in the steering wheel or brake pedal when applying brakes, it may suggest warped rotors.
- Reduced Braking Performance: If your vehicle takes longer to stop than usual or feels less responsive when braking, it could be a sign of worn components.
- Warning Lights: Many modern vehicles have dashboard warning lights that indicate issues with the braking system.
- Fluid Leaks: Puddles of fluid under your vehicle could indicate a leak in the brake lines or calipers.
Being aware of these signs allows for timely intervention before more severe damage occurs.
The Importance of Regular Maintenance
Regular maintenance of your disc brakes is essential for ensuring their longevity and performance. Here are several reasons why you should prioritize this:
- Safety: Properly functioning brakes are critical for safe driving. Regular checks can help prevent accidents caused by brake failure.
- Cost Efficiency: Early detection of issues can save money on extensive repairs later on. Replacing worn pads is significantly cheaper than replacing rotors or calipers.
- Performance: Well-maintained brakes provide better stopping power and responsiveness, enhancing overall vehicle performance.
To maintain your disc brakes effectively, consider scheduling routine inspections with a qualified mechanic who can assess their condition and recommend necessary repairs.
Steps for Repairing Disc Brakes
Repairing disc brakes involves several steps that require careful attention to detail. Here’s a general overview of what you can expect during a typical repair process:
Step 1: Preparation
Before beginning any work on your disc brakes:
- Ensure you have all necessary tools including a car jack, jack stands, socket wrench set, brake cleaner spray, and high-temperature grease.
- Park your vehicle on a flat surface and engage the parking brake for safety.
Step 2: Remove Wheel
Using a jack:
- Lift the vehicle until it is secure on jack stands.
- Remove the lug nuts with a socket wrench and take off the wheel to expose the brake assembly.
Step 3: Inspect Brake Components
Once you have access:
- Check the condition of the rotor for any signs of warping or excessive wear.
- Inspect brake pads; if they are less than 3mm thick, they should be replaced immediately.
Step 4: Remove Caliper
To access the pads:
- Unscrew the bolts holding the caliper in place.
- Carefully slide it off without disconnecting any hydraulic lines unless necessary.
Step 5: Replace Brake Pads
With the caliper removed:
- If replacing pads, compress the caliper piston using a C-clamp.
- Slide new pads into place ensuring they fit snugly against the rotor.
Step 6: Reinstall Caliper
After replacing pads:
- Reattach the caliper over new pads.
- Secure it with bolts but avoid overtightening which can cause damage.
Step 7: Install New Rotor (if necessary)
If rotors need replacement:
- Remove old rotor by unscrewing any retaining screws.
- Install new rotor by aligning it with wheel studs and securing it properly.
Step 8: Clean Components
Before reassembling:
- Use brake cleaner to remove dust and debris from all components.
- Ensure all surfaces are clean for optimal performance.
Step 9: Reassemble Wheel
Once everything is in place:
- Reinstall wheel onto hub.
- Tighten lug nuts securely before lowering vehicle back to ground level.
Step 10: Test Brakes
After completing repairs:
- Pump the brake pedal several times to ensure proper engagement.
- Conduct a test drive at low speeds to confirm functionality before returning to regular driving conditions.
FAQs About Disc Brakes Repair
- How often should I replace my disc brakes?
Typically every 30,000 to 70,000 miles depending on driving habits. - What causes disc brakes to wear out?
Friction from braking generates heat which leads to wear over time. - Can I replace just one brake pad?
It’s recommended to replace all pads on an axle at once for balanced performance. - What tools do I need for disc brake repair?
A car jack, socket wrench set, C-clamp, and brake cleaner are essential. - Is it safe to drive with worn disc brakes?
No, driving with worn brakes significantly increases accident risk.
Maintaining your disc brakes is vital not only for safety but also for enhancing vehicle performance. By understanding why repairs are necessary and how to address them effectively, you can ensure your vehicle remains safe and reliable on the road. Regular inspections and timely repairs will extend the lifespan of your braking system while providing peace of mind during every journey.